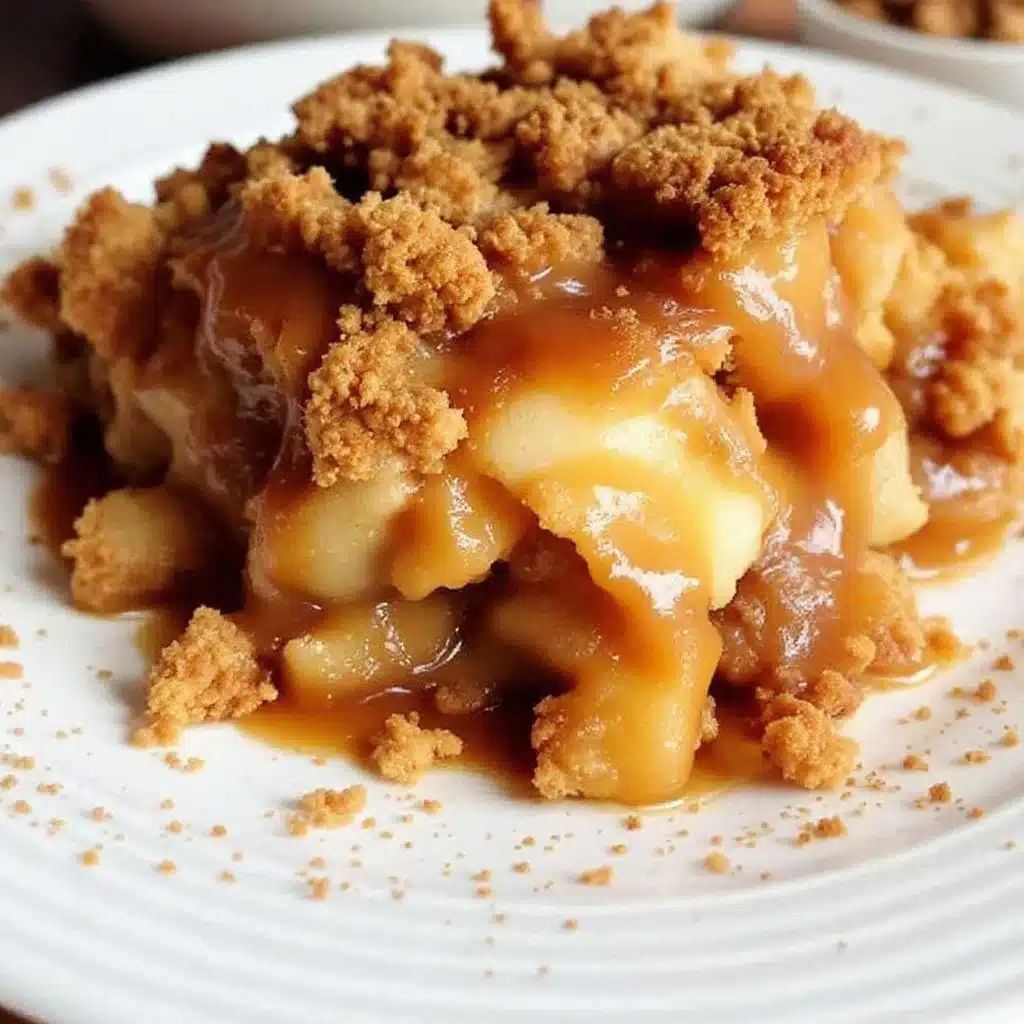
The bowl was empty. Actually, it wasn’t just empty; it was scraped clean with a spoon, leaving behind only a few stubborn crumbs of oat topping that clung to the ceramic. My husband stood by the counter, licking caramel off his thumb, and asked if I had any more apples in the fridge. It was the third time that week he’d asked. Honestly, I didn’t blame him. The smell of brown sugar and cinnamon had already drifted through the house, wrapping around the kids like a warm blanket before the dish even hit the table.
I remember the first time I made this Cozy Salted Caramel Apple Crisp. I was trying to be fancy, using some imported sea salt that cost more than the apples themselves. It turned out too salty, honestly. But the second time? Perfect balance. The sweetness of the cooked fruit meets that sharp, savory kick, and suddenly, everyone in the kitchen is fighting for the last piece.
It’s funny how a simple dish can become such a ritual. We don’t even wait for dessert anymore. As soon as the oven timer beeps, chairs scrape back, and forks go in. It’s not about being a gourmet chef. It’s about that moment when the house smells like autumn and everyone is happy. That’s the real win. You know?
I started making this because I needed something easy but impressive. Sometimes you just want to sit down and relax, not spend hours fussing over a complicated pie crust. This crisp is forgiving. If your apples are a little mushy, no big deal. If the caramel is a bit thin, it just soaks into the oats better. It’s comfort food that doesn’t take over your life. And now, it’s just what we do when the leaves start turning.
Why You’ll Love This Recipe
Let’s be real for a second. Making desserts can be stressful. You worry about the crust cracking or the filling bubbling over. With this Cozy Salted Caramel Apple Crisp, those worries vanish. I’ve tested this recipe more times than I care to admit, tweaking the ratio of oats to flour until I got that perfect crunch. It’s not just another apple dessert; it’s the one that keeps people coming back to the kitchen.
Here is why this recipe stands out from the crowd:
- Quick & Easy: You can have this from start to finish in under an hour. No chilling time for dough, no complex steps. Just toss, bake, and enjoy. It’s perfect for those busy weeknights when you want something homemade but don’t have all day.
- Simple Ingredients: You likely have most of this in your pantry right now. Apples, oats, brown sugar, butter, and salt. No fancy grocery trips needed. It’s wholesome and straightforward, which means fewer dishes and less stress.
- Perfect for Cozy Nights: Whether it’s a rainy Tuesday or a Friday night movie marathon, this crisp adds that warm, inviting vibe to your home. It’s the ultimate comfort food for chilly evenings.
- Crowd-Pleaser: Kids love the sweetness, and adults appreciate the hint of salt. It bridges the gap perfectly. I’ve served this at potlucks, and it’s always the first dish to disappear. Even the picky eaters go back for seconds.
- Unbelievably Delicious: The texture is next-level. You get the soft, spiced apples underneath and that crunchy, buttery oat topping on top. The salted caramel ties it all together, adding a rich depth that regular sugar just can’t match.
What makes this different is the balance. Too many crisp recipes are just sweet apples with a sugary topping. This one has a savory edge that wakes up your palate. It’s not just good; it’s the kind of dessert that makes you close your eyes after the first bite. It’s familiar yet special. You can serve it to impress guests without spending hours in the kitchen, or just enjoy it as a quiet treat with a cup of coffee. It’s reliable, delicious, and honestly, it just works.
What Ingredients You Will Need
This recipe relies on simple, high-quality ingredients to deliver bold flavor. You don’t need anything exotic, but the quality of what you use matters. For instance, the type of apple makes a huge difference in the final texture. I like to use a mix of tart and sweet apples to keep the flavor interesting.
Here is what you’ll need to gather:
For the Apple Filling
- Apples (6-7 medium): I recommend a mix of Granny Smith and Honeycrisp. The Granny Smiths hold their shape, while the Honeycrisps break down slightly to create a saucy texture. Look for firm apples that aren’t bruised.
- Lemon Juice (2 tablespoons): Freshly squeezed. This prevents the apples from browning and adds a bright acidity that cuts through the sweetness.
- Granulated Sugar (1/4 cup): Helps draw out the juices from the apples as they cook.
- Ground Cinnamon (1 teaspoon): Essential for that classic fall flavor. Don’t skip it.
- Nutmeg (1/4 teaspoon): Just a pinch adds warmth. If you don’t have it, you can skip it, but it’s nice.
- Apple Cider (1/4 cup): Adds moisture and intensity. Use a good quality cider for the best flavor.
For the Salted Caramel Layer

- Salted Caramel Sauce (1 cup): You can use store-bought or homemade. I prefer Smucker’s or Parker House for convenience, but homemade is richer. Make sure it’s warm and pourable.
- Sea Salt Flakes (1 teaspoon): For sprinkling on top. This is crucial for the “salted” part. It enhances the caramel flavor.
For the Crisp Topping
- Old-Fashioned Rolled Oats (1 cup): These give the best texture. Quick oats will get too mushy. Old-fashioned oats stay chewy and crunchy.
- All-Purpose Flour (1 cup): Acts as a binder for the oats. If you need gluten-free, use a 1:1 gluten-free flour blend.
- Brown Sugar (1 cup): Packed. This gives a deep, molasses-like flavor that pairs perfectly with the apples.
- Unsalted Butter (1/2 cup): Cold and cubed. Cold butter creates flaky, distinct crumbs. Melted butter will make it more like a cake.
- Vanilla Extract (1 teaspoon): Adds a subtle aromatic depth.
Equipment Needed
You don’t need much for this recipe, which is part of the appeal. A standard 9×9 inch baking dish is perfect. I use a ceramic one because it heats evenly and looks nice when serving. If you don’t have one, a glass Pyrex dish works just as well, though you might need to watch the bottom closely so it doesn’t burn.
A medium mixing bowl is all you need for the topping. A large spoon or your hands work fine for mixing. For the apples, a sharp knife and a cutting board are essential. I also recommend a measuring cup for the caramel sauce to make pouring easier. If you’re making homemade caramel, a saucepan and a whisk are needed, but for this version, store-bought saves time. No fancy gadgets required. Just basic tools you probably already have.
Preparation Method
Making this crisp is straightforward. Here is how to do it step-by-step.
Step 1: Prep the Apples (10 minutes)
Preheat your oven to 350°F (175°C). Peel, core, and slice the apples into thin, even slices. Aim for about 1/4 inch thickness. If they are too thick, they won’t cook through. If they are too thin, they turn into applesauce. Place the sliced apples in a large bowl.
Step 2: Season the Filling (5 minutes)
Add the lemon juice, granulated sugar, cinnamon, nutmeg, and apple cider to the apples. Toss everything together until the apples are well coated. The lemon juice will keep them from turning brown while you work. Taste a slice—it should be slightly sweet but with a tangy kick. If it’s too tart, add a bit more sugar.
Step 3: Assemble the Base (5 minutes)
Pour the seasoned apples into your prepared 9×9 baking dish. Spread them out evenly. You want a relatively flat layer so the topping cooks uniformly. Don’t pile them too high in the center, or the middle might stay raw.
Step 4: Add the Caramel (5 minutes)
Drizzle the warm salted caramel sauce evenly over the apples. Use a spatula to gently spread it if needed, but try not to mix it in too much. You want pockets of caramel to bubble up through the topping. Sprinkle the sea salt flakes lightly over the caramel. This is where the magic happens—the salt cuts the sweet.
Step 5: Make the Topping (5 minutes)
In a medium bowl, combine the rolled oats, flour, and brown sugar. Add the vanilla extract. Cut in the cold, cubed butter using a pastry cutter or your fingers. Work until the mixture resembles coarse crumbs with some larger clumps. These clumps are key for that crunchy texture. Don’t overmix it into a paste.
Step 6: Bake (45-50 minutes)
Sprinkle the oat mixture evenly over the caramel-covered apples. Place the dish in the preheated oven. Bake for 45-50 minutes. You’ll know it’s done when the topping is golden brown and the filling is bubbling vigorously around the edges. If the top starts browning too quickly, cover it loosely with foil.
Step 7: Cool and Serve
Let the crisp cool for at least 15 minutes before serving. This allows the filling to thicken slightly. If you cut into it immediately, the juices will run out, and it’ll be soupy. Serve warm with vanilla ice cream or whipped cream.
Cooking Tips & Techniques
Getting the topping right is the most important part. I’ve made the mistake of using melted butter before, and the result was a soggy, cake-like mess. Always use cold butter. It creates steam pockets as it melts, leading to those beautiful, crunchy bits. If you’re in a rush, you can grate the cold butter into the dry ingredients—it works surprisingly well.
Another tip is about the apples. Don’t use red delicious apples if you can help it. They get mealy and lose their flavor when baked. Stick to firm varieties like Granny Smith, Honeycrisp, or Braeburn. They hold their structure and provide a nice contrast to the soft caramel.
Timing is everything. Keep an eye on the edges. If they’re browning too fast, tent with foil. I learned this the hard way when I burned the first batch. Now, I set a timer for 40 minutes and check the color. It’s better to pull it out a minute early than to burn it. Also, let it cool. I know it’s tempting to dig in, but patience pays off with better texture.
Variations & Adaptations
This recipe is flexible. Here are some ways to tweak it:
- Gluten-Free: Swap the all-purpose flour for a gluten-free blend. Ensure your oats are certified gluten-free if you have sensitivities.
- Dairy-Free: Use vegan butter in the topping and check your caramel sauce for dairy content. Many store-bought caramels are dairy-free, but some contain butter.
- Nut-Free: Add chopped pecans or walnuts to the topping for extra crunch. Just ensure no one has nut allergies.
- Spice It Up: Add a pinch of cardamom or ginger for a warmer, spicier flavor profile.
I once tried adding a layer of cheesecake filling in the middle. It was delicious but heavy. Stick to the classic version for best results. You can also use pear instead of apples for a milder flavor. It’s a nice change for winter.
Serving & Storage Suggestions
Serve this crisp warm. It’s best eaten fresh out of the oven. Pair it with a scoop of vanilla bean ice cream or a dollop of whipped cream. A cup of hot tea or coffee complements the flavors well.
Leftovers can be stored in the refrigerator for up to 5 days. Cover tightly with plastic wrap or transfer to an airtight container. To reheat, warm individual portions in the microwave for 30-60 seconds. For a crisper topping, reheat in the oven at 350°F for 10 minutes. It freezes well too. Wrap tightly in foil and freeze for up to 3 months. Thaw in the fridge before reheating.
The flavors meld together over time, making it even better on day two. The oats absorb more of the caramel, becoming chewier. It’s still delicious, just with a different texture.
Nutritional Information & Benefits
This dessert is rich in calories due to the butter and sugar, but it also provides fiber from the oats and apples. Apples are a good source of vitamin C and antioxidants. Oats offer beta-glucan, which supports heart health. However, enjoy in moderation. One serving is roughly 350-400 calories. It’s not a health food, but it’s a treat that uses real ingredients. For a lighter option, serve a smaller portion with fresh fruit on the side.
Conclusion
This Cozy Salted Caramel Apple Crisp is a winner. It’s easy, delicious, and perfect for any time of year. I love how simple it is to make yet how impressive it tastes. Try it your way—add nuts, change the apples, or skip the salt if you prefer. It’s your kitchen, your rules.
I hope you give this a try. It’s become a staple in our house, and I think it will be in yours too. Let me know how it turns out in the comments! Share your photos or variations. I love seeing what you create. Thanks for reading, and happy baking!
FAQs
Can I use frozen apples for this crisp?
Yes, you can use frozen apples, but thaw them first and drain excess liquid. Frozen apples can be watery, so you might need to bake it a few minutes longer. Fresh apples are best for texture.
What is the best type of caramel sauce to use?
Any good quality salted caramel sauce works. I like store-bought for convenience, but homemade is richer. Avoid sugar-free versions as they can change the texture.
How do I prevent the topping from getting soggy?
Use cold butter and don’t overmix the topping. Also, ensure the apples are not too wet before adding the topping. Let the crisp cool slightly before serving to let the juices set.
Can I make this in a different size dish?
Yes, you can use a 9×13 inch dish for a thinner crisp, or a smaller 8×8 inch dish for a thicker one. Adjust baking time accordingly. A larger dish will bake faster.
Is this recipe gluten-free friendly?
Yes, if you use gluten-free flour and certified gluten-free oats. Check your caramel sauce label to ensure it’s gluten-free. Most ingredients are naturally gluten-free.
Pin This Recipe!

Cozy Salted Caramel Apple Crisp: 5-Step Easy Dessert

A comforting and easy-to-make apple crisp featuring a sweet and tart apple filling, a rich salted caramel layer, and a crunchy oat topping. Perfect for cozy nights and busy weeknights.
- Prep Time: 25 minutes
- Cook Time: 45-50 minutes
- Total Time: 70-75 minutes
- Yield: 8 servings 1x
- Category: Dessert
- Cuisine: American
Ingredients
- 6–7 medium apples (mix of Granny Smith and Honeycrisp), peeled, cored, and sliced
- 2 tablespoons fresh lemon juice
- 1/4 cup granulated sugar
- 1 teaspoon ground cinnamon
- 1/4 teaspoon nutmeg
- 1/4 cup apple cider
- 1 cup salted caramel sauce (warm)
- 1 teaspoon sea salt flakes
- 1 cup old-fashioned rolled oats
- 1 cup all-purpose flour
- 1 cup packed brown sugar
- 1/2 cup unsalted butter, cold and cubed
- 1 teaspoon vanilla extract
Instructions
- Preheat oven to 350°F (175°C).
- Peel, core, and slice apples into 1/4 inch thick slices. Place in a large bowl.
- Add lemon juice, granulated sugar, cinnamon, nutmeg, and apple cider to the apples. Toss to coat evenly.
- Pour the seasoned apples into a 9×9 inch baking dish and spread into an even layer.
- Drizzle the warm salted caramel sauce over the apples and sprinkle with sea salt flakes.
- In a medium bowl, combine oats, flour, and brown sugar. Add vanilla extract.
- Cut in the cold, cubed butter using a pastry cutter or fingers until the mixture resembles coarse crumbs with some larger clumps.
- Sprinkle the oat topping evenly over the caramel-covered apples.
- Bake for 45-50 minutes, or until the topping is golden brown and the filling is bubbling. Cover with foil if browning too quickly.
- Let cool for at least 15 minutes before serving to allow the filling to thicken.
Notes
Use cold butter for the topping to ensure a crunchy texture. Do not use Red Delicious apples as they become mealy. Let the crisp cool for 15 minutes before serving to prevent a soupy texture. Can be made gluten-free by using GF flour and certified GF oats. Can be made dairy-free by using vegan butter and checking caramel sauce ingredients.
Nutrition
- Serving Size: 1 slice
- Calories: 375
- Sugar: 42
- Sodium: 250
- Fat: 14
- Saturated Fat: 8
- Carbohydrates: 58
- Fiber: 4
- Protein: 3
Keywords: apple crisp, salted caramel, dessert, fall recipe, easy baking, oat topping, comfort food