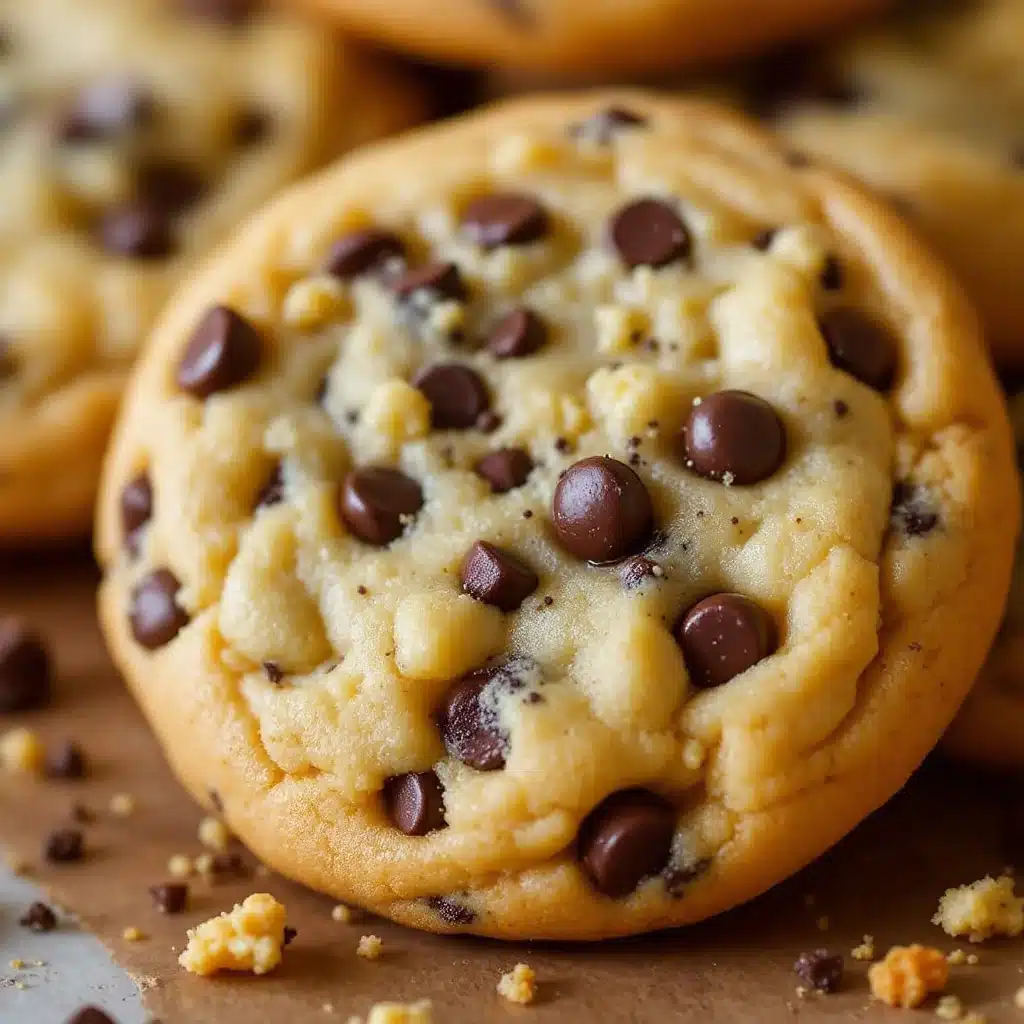
My five-year-old stared at the empty plate, crumbs dusting his chin like powdered sugar snow, and asked if he could have the birthday cookies again. He didn’t even wait for me to finish putting the milk away. He just looked at me with those wide, hopeful eyes and said, “Can we make them tomorrow? And the day after?”
I was standing in the kitchen, wiping down the counter, and I just laughed. It wasn’t a polite laugh, either. It was that full-body, can’t-breathe kind of laugh that happens when you realize your “experiment” has officially taken over your household. We had just finished baking a batch of these soft birthday cake batter chocolate chip cookies, and they were gone. Not just eaten, but vanished. Like they were never there.
Let’s be real for a second. Baking for kids is usually a battle. You spend an hour mixing, another hour waiting, and then you spend twenty minutes negotiating with a toddler who only wants the chocolate chips. But this? This was different. These cookies tasted like a party in your mouth. They were soft, chewy, and smelled like vanilla frosting mixed with warm brown sugar. It’s the kind of flavor that makes you close your eyes and forget about the dishes in the sink.
I tried to explain to him that we couldn’t have them every day because our teeth would fall out (or so I hoped). He didn’t buy it. He just held up a single, slightly broken cookie fragment and said, “It’s okay, Mom. You can make them tomorrow.” And I realized then that I wasn’t just baking cookies. I was baking memories. Or at least, I was baking something that felt like a memory.
There is something magical about birthday cake flavor. It’s nostalgic, sure, but it’s also just really, really good. When you combine that with the reliability of chocolate chips, you get a cookie that feels familiar but exciting. It’s not just a cookie; it’s a celebration. And if my son wants a celebration three days in a row, who am I to say no?
I’ve made a lot of cookies in my life. Some are crisp, some are cakey, and some are just… okay. But this recipe? It sticks. It stays in your mind. You’ll find yourself thinking about the texture—the way it cracks slightly on top but stays soft underneath. You’ll think about the smell of vanilla and butter filling the house. And you’ll think about your kids asking for more.
So, yeah. We made them the next day. And the day after that. If you’re looking for a cookie that brings joy, maybe even a little bit of chaos, give this a try. Just maybe buy extra milk. You’ll need it.
Why You’ll Love This Recipe
These soft birthday cake batter chocolate chip cookies are not just another cookie recipe to add to your endless Pinterest board. They are the result of a lot of trial, error, and a lot of happy faces. I’ve tested this recipe more times than I can count, adjusting the butter, tweaking the flour, and experimenting with different types of chocolate chips to get it just right. Here’s why this one stands out from the crowd.
- Quick & Easy: You know how most baking recipes seem to require a degree in chemistry? Not this one. This comes together in under 30 minutes of active time. Perfect for busy weeknights when you need a sweet treat but don’t have hours to spare. Just mix, scoop, and bake.
- Simple Ingredients: No fancy grocery trips needed. You likely already have everything in your kitchen. Flour, sugar, butter, eggs, vanilla, and baking powder. That’s it. No obscure flours or hard-to-find extracts. It’s pantry-friendly baking at its best.
- Perfect for Parties: Whether it’s a birthday, a school bake sale, or just a cozy Tuesday night, these are great for any occasion. They look festive with their speckled color and taste even better. Plus, they travel well, making them ideal for potlucks.
- Crowd-Pleaser: I’ve served these to picky eaters and serious bakers alike, and they always get rave reviews. Kids love the birthday cake flavor, and adults appreciate the balance of sweetness and chewiness. It’s a win-win.
- Unbelievably Delicious: The texture is next-level comfort food. Soft, chewy, and slightly crisp on the edges, with pockets of melty chocolate chips. The vanilla cake batter flavor is subtle but present, giving you that nostalgic hit without being overly sweet.
What makes this recipe different from the rest? It’s the technique. By using a combination of brown sugar and granulated sugar, along with a touch of cake flour (or all-purpose with a little cornstarch), we achieve that perfect tender crumb. Also, adding a splash of milk to the dough helps create that cake-like texture. It’s not just another version—it’s your best version. I promise you’ll try this one and never go back to dry, hard cookies again.
It’s the kind of cookie that makes you close your eyes after the first bite. It’s comfort food reimagined—healthier in spirit, if not in calories, but with the same soul-soothing satisfaction. Perfect for impressing guests without stress, or turning a simple meal into something memorable. Trust me, once you make these, you’ll understand.
What Ingredients You Will Need
This recipe uses simple, wholesome ingredients to deliver bold flavor and satisfying texture without the fuss. The beauty of these cookies lies in how ordinary ingredients come together to create something extraordinary. You don’t need a specialty store for this; just head to your local grocery store and pick up these staples.
For the Dough
- Unsalted Butter: 1 cup (2 sticks), softened to room temperature. This is crucial for creaming properly. I recommend using a high-quality butter like Kerrygold or Plugra for the best flavor.
- Granulated Sugar: 1 cup. This provides structure and helps with the crisp edges.
- Brown Sugar: 1 cup, packed. This adds moisture and chewiness. Dark brown sugar works well if you want a deeper molasses flavor.
- Eggs: 2 large eggs, room temperature. Room temperature eggs emulsify better into the butter mixture, creating a smoother dough.
- Vanilla Extract: 2 teaspoons. Use pure vanilla extract, not imitation, for the best flavor. It’s the backbone of the birthday cake taste.
- All-Purpose Flour: 2 ½ cups. This is the base of the cookie. If you want a softer texture, you can substitute 2 tablespoons with cornstarch.
- Baking Powder: 1 teaspoon. This helps the cookies rise slightly, giving them that cake-like lift.
- Baking Soda: ½ teaspoon. This aids in browning and spreading.
- Salt: 1 teaspoon. Essential for balancing the sweetness.
For the Mix-Ins
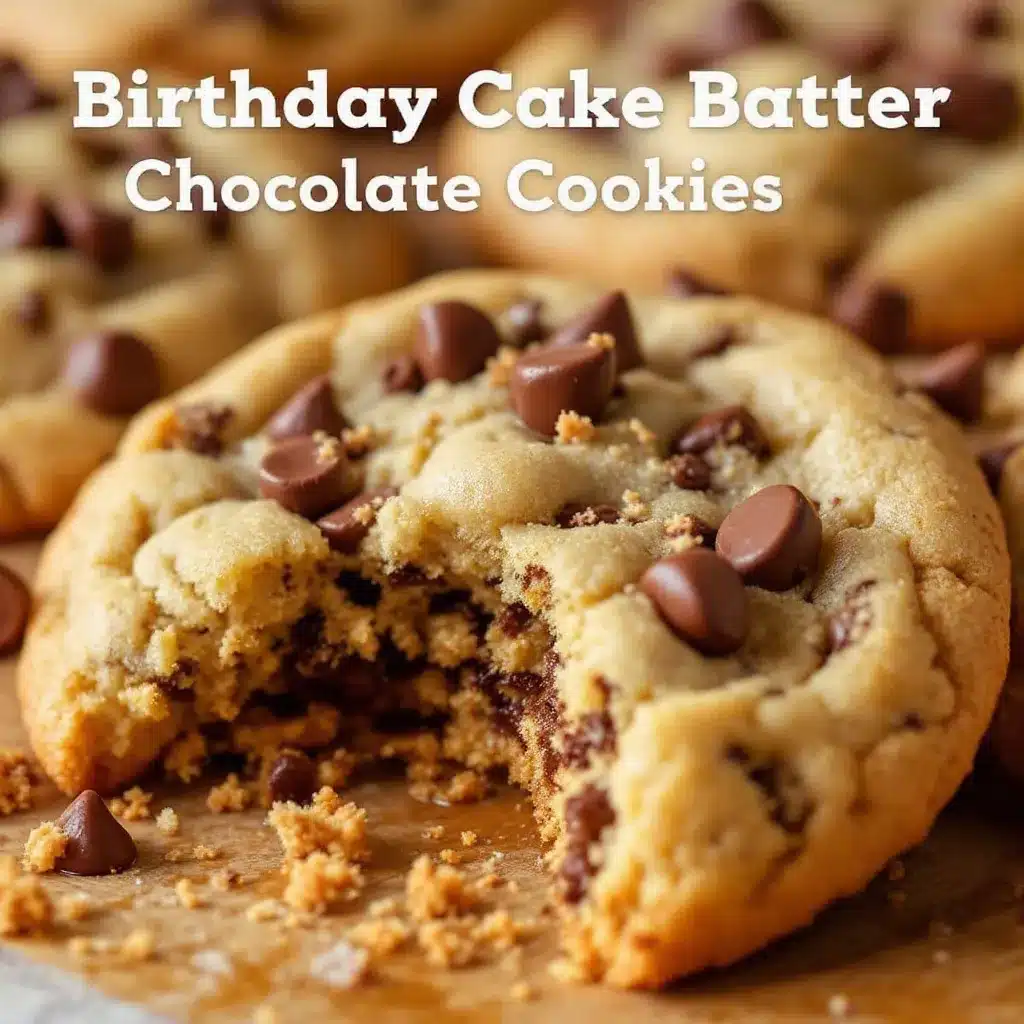
- White Chocolate Chips: 1 cup. These add the sweet, creamy birthday cake flavor. You can also use white chocolate chunks for a more rustic look.
- Milk Chocolate Chips: 1 cup. For the chocolate lover in you. Semi-sweet works too if you prefer less sweetness.
- Funfetti Sprinkles: ½ cup. Optional, but highly recommended for that authentic birthday cake look. Jimmies hold up better than nonpareils during baking.
For the best results, make sure your butter is softened but not melted. If it’s too warm, the cookies will spread too much. If it’s too cold, the dough won’t cream properly. A good test is to press your finger into it; it should leave an indent but not feel greasy. Also, don’t skip the salt. It might seem like a small detail, but it really makes the flavors pop.
Equipment Needed
You don’t need a lot of fancy gadgets to make these cookies, but having the right tools can make a big difference in the outcome. Here’s what you’ll need:
- Mixing Bowls: One large bowl for the dry ingredients and one medium bowl for the wet ingredients. Glass or ceramic bowls are nice because they don’t retain heat, but stainless steel works too.
- Electric Mixer: A hand mixer or stand mixer is highly recommended. Creaming the butter and sugar by hand can be tedious and might not get the texture as light and fluffy. If you do it by hand, be prepared to arm workout.
- Silicone Spatula: For scraping down the sides of the bowl and folding in the chocolate chips. A sturdy spatula ensures you don’t waste any dough.
- Baking Sheets: Heavy-gauge aluminum baking sheets are best because they distribute heat evenly. Dark non-stick sheets can cause the bottoms to burn, so keep an eye on them.
- Parchment Paper: Always line your baking sheets with parchment paper. It prevents sticking and makes cleanup a breeze. No one likes scrubbing baked-on cookie residue.
- Cooling Rack: Essential for letting the cookies cool properly. If you leave them on the hot baking sheet, they’ll continue to cook and might become too crisp.
- Cookie Scoop: For uniform cookies. It ensures they all bake at the same rate and look professional. A 2-tablespoon scoop is perfect for this recipe.
If you don’t have an electric mixer, you can use a wooden spoon, but it will take more effort. Also, if you don’t have a cooling rack, you can let the cookies cool directly on the baking sheet for a few minutes before transferring them to a plate. Just be careful not to break them while they’re still warm.
Preparation Method
Ready to bake? Let’s walk through the steps. This process is straightforward, but attention to detail makes all the difference.
- Preheat Your Oven: Start by preheating your oven to 350°F (175°C). Make sure it’s fully heated before you put the cookies in. An oven that’s too low will result in flat, greasy cookies.
- Prepare Your Baking Sheets: Line two large baking sheets with parchment paper. This is non-negotiable for easy cleanup and even baking.
- Mix Dry Ingredients: In a medium bowl, whisk together the all-purpose flour, baking powder, baking soda, and salt. Set this aside. Whisking ensures there are no lumps of baking powder or soda, which can cause bitter spots in your cookies.
- Cream Butter and Sugars: In a large bowl, beat the softened unsalted butter, granulated sugar, and brown sugar together using an electric mixer on medium speed. This should take about 2-3 minutes. You want the mixture to be light, fluffy, and pale in color. This step incorporates air, which helps the cookies rise.
- Add Eggs and Vanilla: Add the eggs one at a time, beating well after each addition. Then add the vanilla extract and mix until combined. Scrape down the sides of the bowl with a spatula to ensure everything is evenly mixed.
- Combine Wet and Dry: Gradually add the dry ingredients to the wet ingredients, mixing on low speed just until combined. Do not overmix! Overmixing develops gluten, which makes cookies tough. Stop as soon as you see no more streaks of flour.
- Fold in Mix-Ins: Gently fold in the white chocolate chips, milk chocolate chips, and funfetti sprinkles using your spatula. Be careful not to crush the sprinkles. You want them to be evenly distributed throughout the dough.
- Scoop the Dough: Use a cookie scoop or a spoon to portion the dough onto the prepared baking sheets. Leave about 2 inches of space between each cookie because they will spread. Aim for uniform sizes for even baking.
- Bake: Place the baking sheets in the preheated oven and bake for 10-12 minutes. The cookies are done when the edges are lightly golden but the centers still look soft and slightly underdone. They will continue to cook on the hot baking sheet after you take them out.
- Cool: Let the cookies cool on the baking sheet for 5 minutes. Then, transfer them to a wire rack to cool completely. This step is important for setting the texture. If you try to move them too soon, they might break.
Personal tip: If your dough feels too sticky to scoop, chill it in the fridge for 15 minutes. This makes it easier to handle and helps the cookies hold their shape better. Also, don’t be afraid to slightly underbake them. Soft and chewy is the goal here, not crispy.
Cooking Tips & Techniques
Even the simplest recipes can have pitfalls. Here are some pro tips to ensure your soft birthday cake batter chocolate chip cookies turn out perfectly every time.
Room Temperature Ingredients Matter: As I mentioned earlier, using room temperature butter and eggs is crucial. Cold ingredients won’t emulsify properly, leading to a dense, heavy dough. If you’re in a rush, you can soften butter by microwaving it in short bursts (5-10 seconds at a time) until it’s soft but not melted. For eggs, just place them in a bowl of warm water for 5-10 minutes.
Don’t Overmix the Dough: This is the most common mistake. Once you add the flour, mix only until combined. Overmixing activates gluten, which leads to tough, chewy cookies instead of soft, cakey ones. It’s better to have a few small lumps of flour than to overmix.
Chill the Dough (Optional but Recommended): If you have time, chill the dough in the fridge for at least 30 minutes, or up to 24 hours. This allows the flavors to meld and the fats to solidify, which helps prevent excessive spreading. Chilled dough also results in thicker, chewier cookies.
Watch the Oven Closely: Ovens vary, so keep an eye on your cookies around the 8-minute mark. You want them to be just set in the center with slightly golden edges. If they look too done, take them out early. They will continue to cook from residual heat.
Use Quality Chocolate: The type of chocolate chip you use makes a big difference. High-quality chocolate chips, like Guittard or Ghirardelli, melt better and have a richer flavor than generic brands. Don’t be afraid to chop up a chocolate bar for larger, melty pockets.
Double Scoop for Uniformity: If you want professional-looking cookies, use two spoons or a cookie scoop to create uniform balls. This ensures they all bake at the same rate and look consistent.
Variations & Adaptations
One of the best things about this recipe is its versatility. Here are a few ways to customize it to suit your taste or dietary needs.
Gluten-Free Option: You can substitute the all-purpose flour with a 1:1 gluten-free flour blend. Look for a blend that contains xanthan gum, as this helps mimic the texture of wheat flour. Note that gluten-free cookies may spread more, so chilling the dough is extra important.
Dairy-Free: Swap the unsalted butter with a high-quality vegan butter stick (like Miyoko’s or Earth Balance). Use dairy-free chocolate chips and ensure your sprinkles are also dairy-free. The texture will be slightly different, but still delicious.
Flavor Variations: Add 1 teaspoon of almond extract to the dough for a different flavor profile. Or, swap half of the chocolate chips for butterscotch chips for a caramel-like taste. You can also add ½ cup of chopped nuts, like pecans or walnuts, for extra crunch.
Mini Cookies: For party-sized treats, use a mini cookie scoop or small spoon to make bite-sized cookies. Reduce the baking time to 6-8 minutes. These are perfect for kids’ parties or gift-giving.
Red Velvet Twist: Add 1 tablespoon of cocoa powder and a few drops of red food coloring to the dough for a red velvet birthday cake flavor. This is a fun twist for Valentine’s Day or special celebrations.
I once made these with crushed up peppermint candies instead of sprinkles, and they were a huge hit during the holidays. Don’t be afraid to experiment. Baking is supposed to be fun!
Serving & Storage Suggestions
These cookies are best served slightly warm, right out of the oven with a cold glass of milk. But they’re also great at room temperature or even cold from the fridge.
Storage: Store leftovers in an airtight container at room temperature for up to 5 days. To keep them soft, place a slice of bread in the container with the cookies. The bread will release moisture, keeping the cookies fresh. If you want to store them longer, freeze the dough balls on a baking sheet, then transfer to a freezer bag. Bake from frozen, adding 1-2 minutes to the baking time.
Reheating: If you have leftover baked cookies, reheat them in the microwave for 10-15 seconds to soften them up. Or, warm them in a 300°F oven for 5 minutes.
Pairing: These cookies pair well with coffee, tea, or milk. They also make a great dessert when served with a scoop of vanilla ice cream or a dollop of whipped cream. The contrast of warm cookie and cold ice cream is pure heaven.
Over time, the flavors will meld and become even more pronounced. I’ve found that day-old cookies often taste better than fresh ones, as the sugars have had time to crystallize slightly and the flavors to deepen.
Nutritional Information & Benefits
While these are definitely a treat, they are made with simple ingredients that you can feel good about. Here’s an approximate nutritional breakdown per cookie (assuming 24 cookies):
- Calories: ~180
- Fat: 9g
- Carbohydrates: 24g
- Sugar: 16g
- Protein: 2g
The butter and eggs provide healthy fats and protein, while the flour offers energy. The chocolate chips add a bit of antioxidants, though they are also high in sugar. These cookies are not gluten-free or dairy-free by default, but adaptations are easy. For a lower-sugar option, you can reduce the sugar by ¼ cup, though the texture may be slightly less chewy.
From a wellness perspective, baking at home allows you to control the ingredients. You know exactly what goes into these cookies, unlike store-bought versions that may contain preservatives and artificial flavors. Plus, the act of baking itself can be a stress-relieving activity. So, enjoy these cookies as a mindful treat.
Conclusion
These soft birthday cake batter chocolate chip cookies are more than just a recipe; they are a source of joy. They bring people together, spark conversations, and create happy memories. Whether you’re baking for your kids, your friends, or just for yourself, these cookies are sure to please.
I encourage you to try this recipe and make it your own. Add your favorite mix-ins, try different types of chocolate, or experiment with flavors. Baking is a personal journey, and there are no rules—only delicious possibilities.
Thank you for letting me share this recipe with you. I’d love to hear how it turns out for you. Please leave a comment below with your thoughts, or share a photo of your creation on social media. Tag me so I can see your beautiful cookies!
Happy baking, and enjoy every bite. These cookies are worth every calorie, I promise.
Frequently Asked Questions
Can I use margarine instead of butter?
While you can use margarine, it’s not recommended. Margarine has a higher water content and different fat structure, which can affect the texture and spread of the cookies. Butter provides the best flavor and texture. If you need a dairy-free option, use a high-quality vegan butter stick.
Why did my cookies spread too much?
This usually happens if the butter was too warm or if the dough wasn’t chilled. Make sure your butter is softened but not melted. Also, try chilling the dough for 30 minutes before baking. If your oven runs hot, consider lowering the temperature by 25°F.
Can I freeze the cookie dough?
Yes! Scoop the dough onto a baking sheet and freeze until solid, then transfer to a freezer bag. You can bake them from frozen, just add 1-2 minutes to the baking time. This is a great way to have fresh cookies on hand anytime.
Can I use cake mix in this recipe?
Some recipes call for adding dry cake mix, but I prefer using the ingredients separately to control the sweetness and texture. However, if you want to use cake mix, you can substitute 1 cup of flour with 1 cup of dry vanilla cake mix. Just reduce the added sugar slightly.
How do I make the cookies softer?
To keep cookies soft, underbake them slightly. Remove them from the oven when the centers still look soft and take them off the baking sheet to cool. Storing them in an airtight container with a slice of bread also helps maintain softness.
Pin This Recipe!
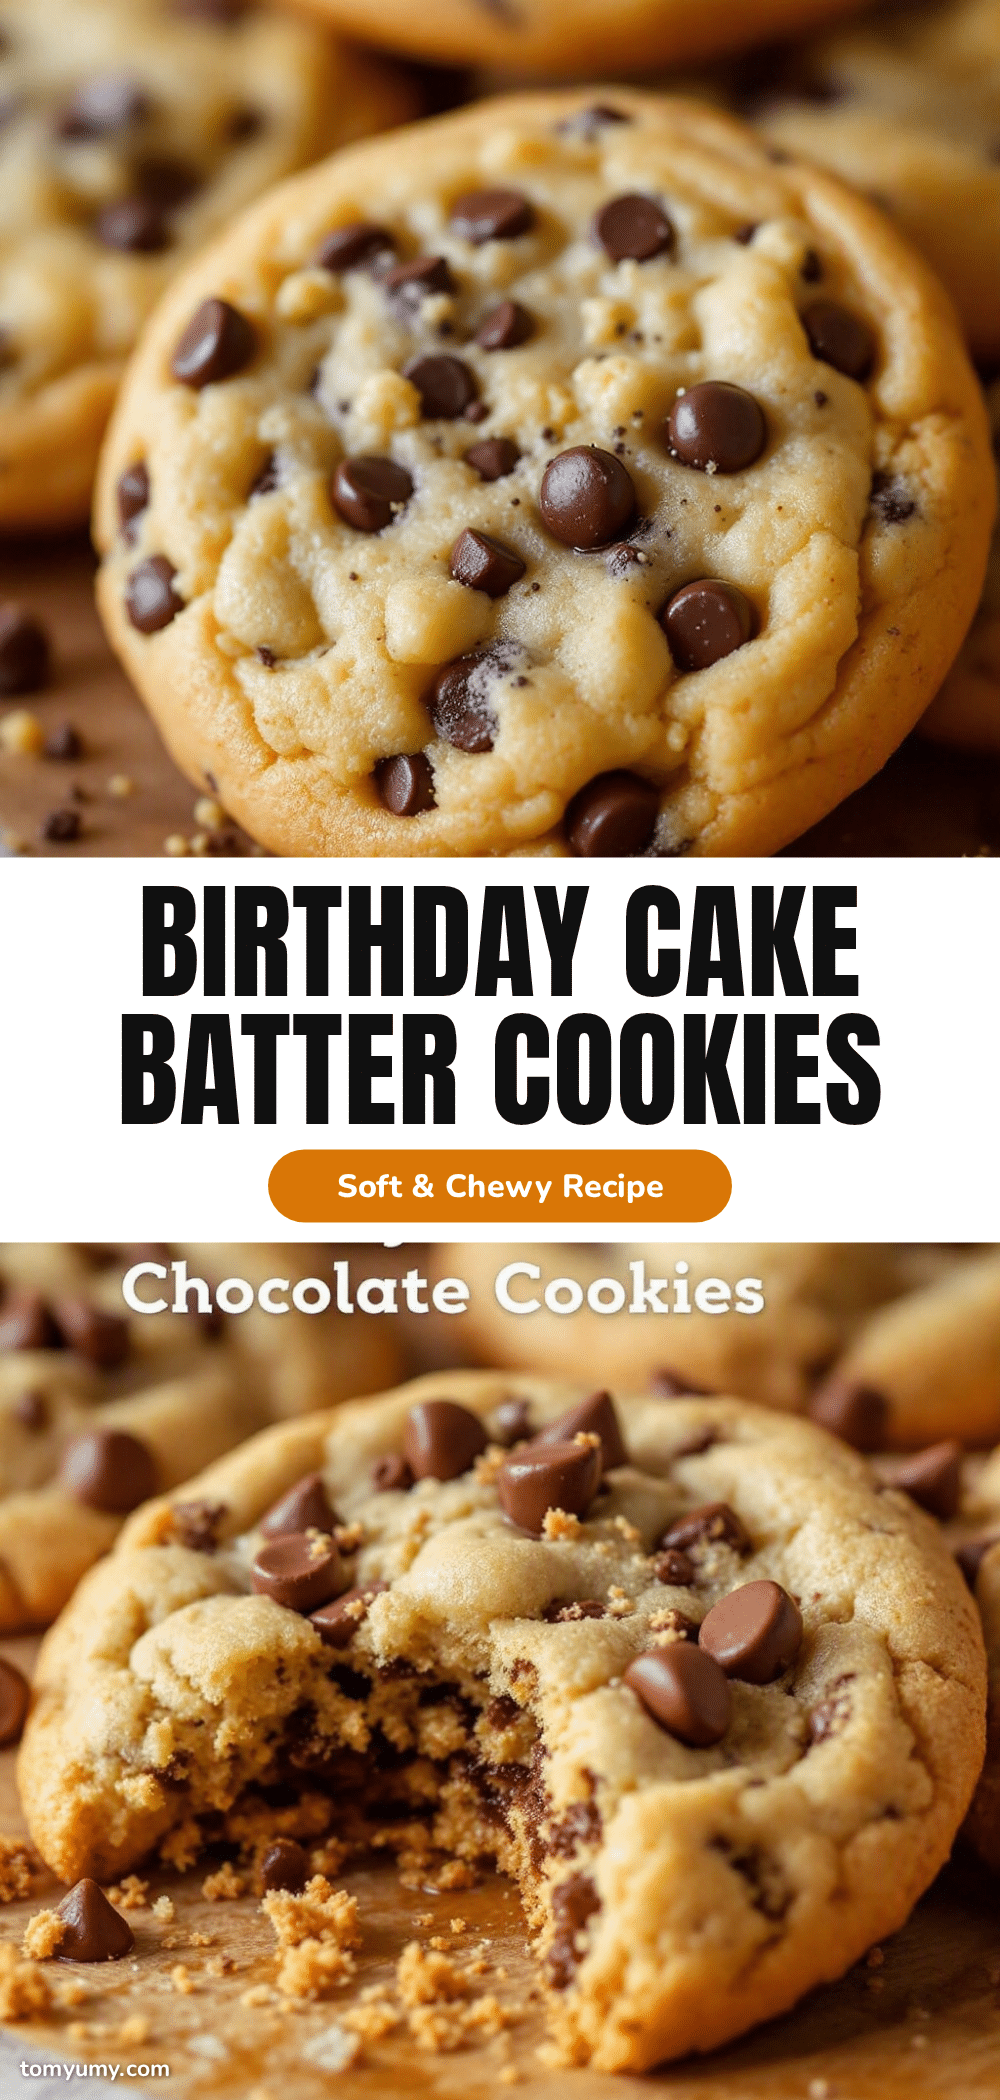
Soft Birthday Cake Batter Cookies: Best Easy Homemade Recipe

Soft, chewy birthday cake batter chocolate chip cookies that taste like a party in your mouth. Made with simple pantry ingredients, these cookies are quick to prepare and perfect for any occasion.
- Prep Time: 15 minutes
- Cook Time: 10-12 minutes
- Total Time: 25 minutes
- Yield: 24 cookies 1x
- Category: Dessert
- Cuisine: American
Ingredients
- 1 cup (2 sticks) unsalted butter, softened to room temperature
- 1 cup granulated sugar
- 1 cup packed brown sugar
- 2 large eggs, room temperature
- 2 teaspoons pure vanilla extract
- 2 ½ cups all-purpose flour
- 1 teaspoon baking powder
- ½ teaspoon baking soda
- 1 teaspoon salt
- 1 cup white chocolate chips
- 1 cup milk chocolate chips
- ½ cup funfetti sprinkles
Instructions
- Preheat oven to 350°F (175°C) and line two large baking sheets with parchment paper.
- In a medium bowl, whisk together the all-purpose flour, baking powder, baking soda, and salt. Set aside.
- In a large bowl, beat the softened butter, granulated sugar, and brown sugar with an electric mixer on medium speed for 2-3 minutes until light and fluffy.
- Add eggs one at a time, beating well after each addition. Add vanilla extract and mix until combined. Scrape down the sides of the bowl.
- Gradually add the dry ingredients to the wet ingredients, mixing on low speed just until combined. Do not overmix.
- Gently fold in the white chocolate chips, milk chocolate chips, and funfetti sprinkles.
- Scoop dough onto prepared baking sheets, leaving 2 inches of space between cookies.
- Bake for 10-12 minutes until edges are lightly golden but centers look soft.
- Let cookies cool on the baking sheet for 5 minutes, then transfer to a wire rack to cool completely.
Notes
Ensure butter is softened but not melted. Do not overmix the dough to avoid tough cookies. For softer cookies, slightly underbake them. Store in an airtight container with a slice of bread to maintain softness. Dough can be chilled for 30 minutes to prevent spreading.
Nutrition
- Serving Size: 1 cookie
- Calories: 180
- Sugar: 16
- Sodium: 150
- Fat: 9
- Saturated Fat: 5
- Carbohydrates: 24
- Fiber: 1
- Protein: 2
Keywords: birthday cake cookies, chocolate chip cookies, soft cookies, easy baking, homemade cookies, funfetti cookies